The Latest
Why Interior Designers are Loving Project Studio
In the interior design industry, it’s easy to accidentally have 17 tabs open, like several mood boards, supplier pages, schedules, client emails, and that one spreadsheet you swear you’ll edit and update later. It’s a creative industry, and what comes with that is multitasking and juggling so many different communications or projects.
If you’re craving more creativity rather than admin, then this one’s for you. You’ve probably already heard of Project Studio since it was launched in 2025, but after we’ve had a whole year of designers streamlining their workflow, we want to show you exactly how it’s been used and how you can use it too. Whether you’ve just signed up and don’t know the next step, or you want to learn more, we’ve collated some tips and tricks so you can get started with ease.
It was built for designers and built on feedback from designers. If your current process involves juggling PDFs, spreadsheets, email threads, and multiple versions of the same document, Project Studio is a central project hub that keeps everything in one beautifully organised place. Let’s see why interior designers are loving Project Studio, and we’re here to help start your first project and level up in your industry.
Turn Ideas into Action
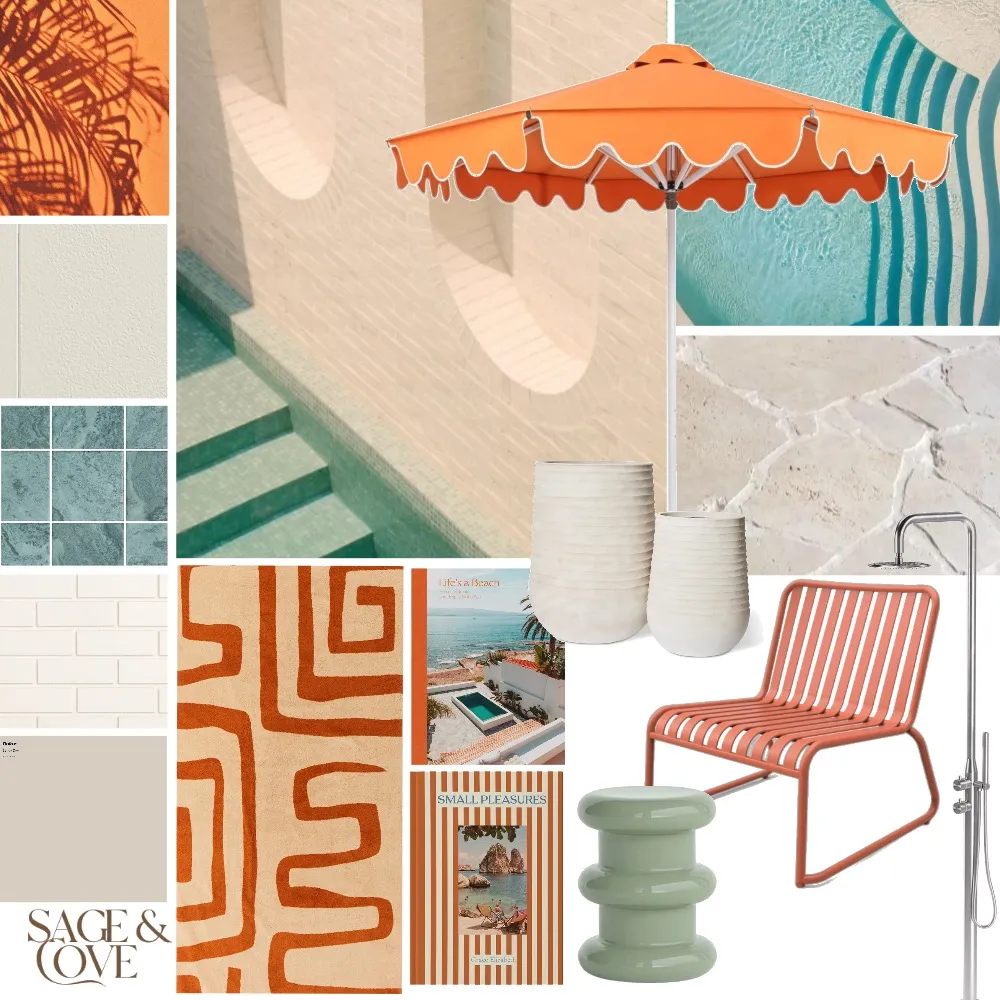
Trust us when we say you can dive into a world of possibilities with Project Studio. Beyond the mood board tool, you can explore our library of 100,000+ products from 500+ brands and pull them straight into your projects in seconds. You can also seamlessly add products from other brands and inspiration from Pinterest, bringing every idea, reference, and specification together in one beautifully organised place, to keep your vision at the core. Here’s how you can turn your ideas into action. It really is this simple:
Your First Project is Easy
1. Upload banner image
2. Add project details
3. Set the tone with a project overview
4. Add rooms
5. Insert content blocks
6. Build out the rest of your project
7. Publish and share with the client
“One of the biggest tools in Project Studio is that the client can go through the schedule and either approve all at once, or go through and say it needs to be in review for a specific reason, and they can add a comment, or they can decline if there’s option 1 and 2 to consider. They can also add comments, which is really handy.”
Francesca, Interior Designer | Studio Cesca
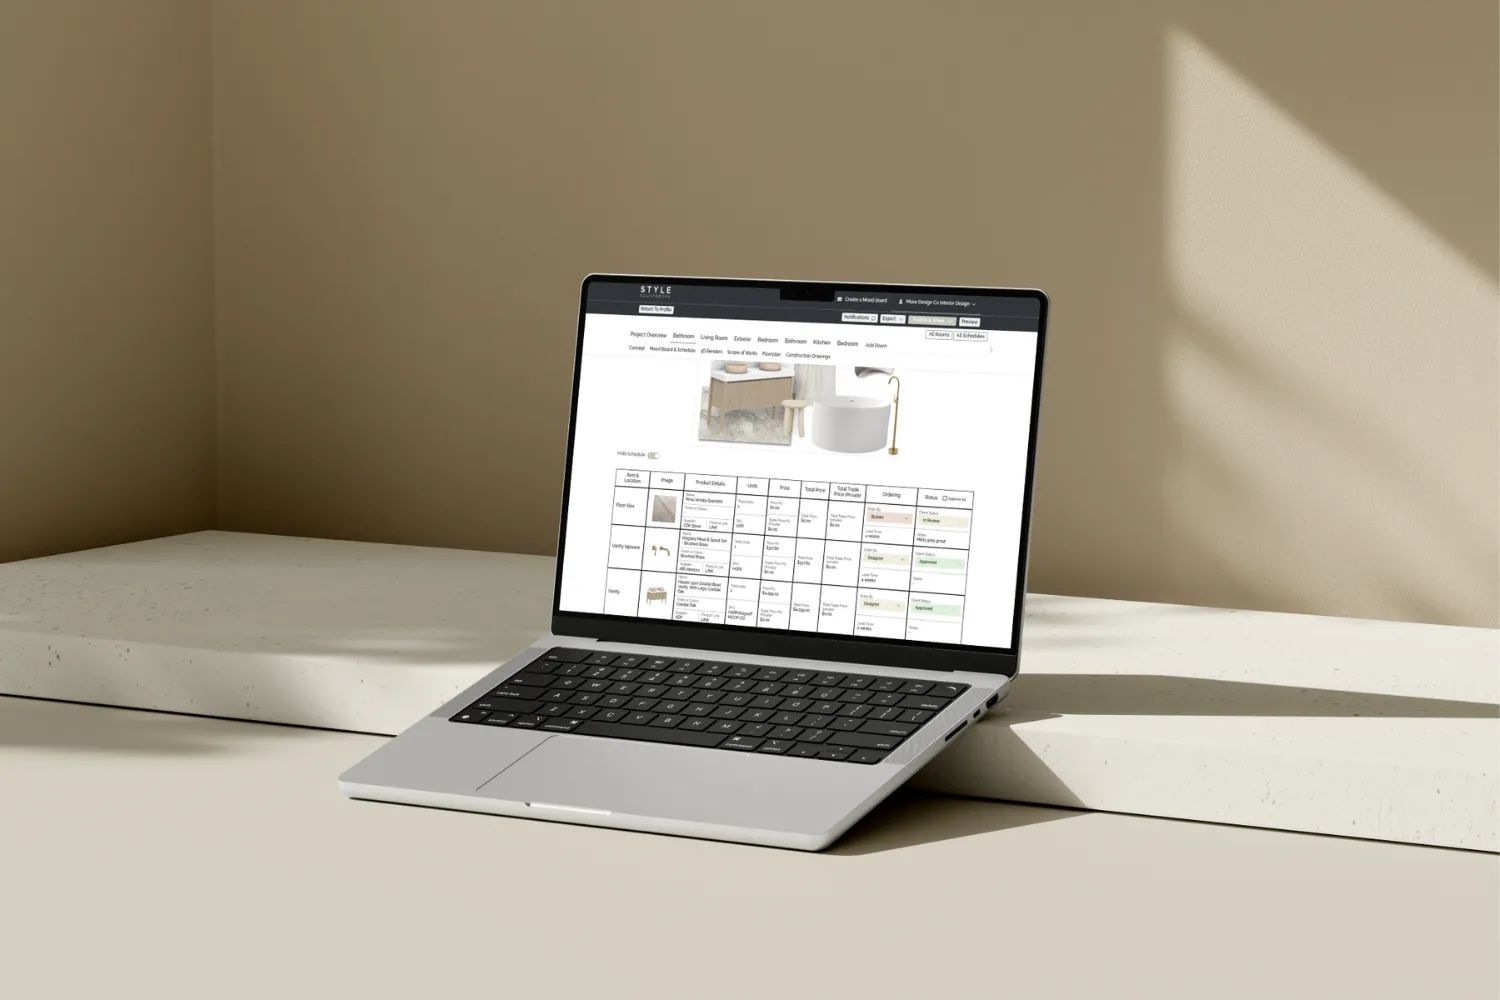
Create a Schedule in Under Two Seconds
Now you’ve explored our product library and mood board inspiration, let’s walk through how you can turn your mood board into a specification schedule with just one click. Avoid the manual errors, skip the spreadsheets, and spend more time being creative now that you don’t need to stress about specification schedules.
Step 1: Add Your Mood Board
Upload your Style Sourcebook mood board on your project page in Project Studio. Here’s how:
Click ‘Add Content’ > Mood Board & Schedule
Choose an existing mood board, or ‘Create New’
Add a heading title to keep your layout organised
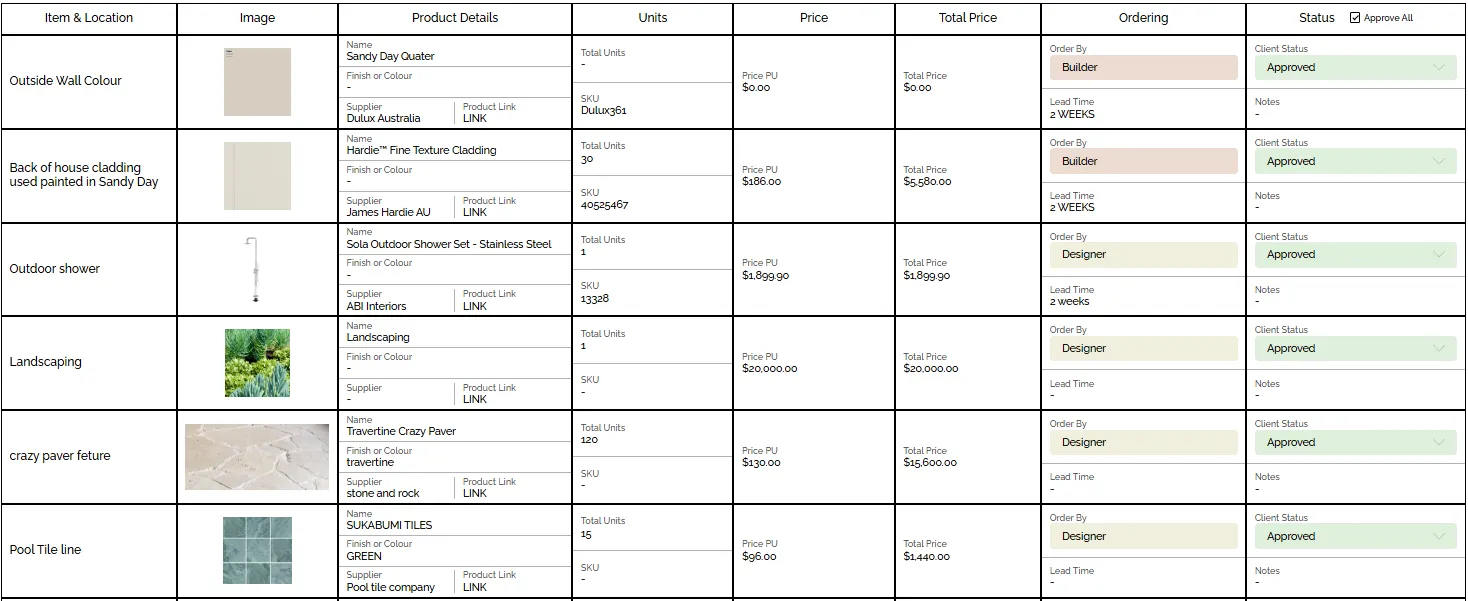
Step 2: Auto-Create Your Specification Schedule
With one click, Project Studio instantly generates a professional specification schedule that’s complete with product images, details, and links, all pulled directly from your mood board.
Want to personalise it? Add locations, trade pricing, order responsibilities, lead times, and internal notes.
Why Designers Are Switching to Project Studio
If you haven’t explored Project Studio yet, or haven’t started your first project, you’ll love the features. Don’t just take it from us; we’ve had such great feedback from designers telling us how they’ve saved time, stress, and money from the platform. Here are some of the great features, and let’s see what designers in the Style Sourcebook Community are saying about Project Studio.
It syncs seamlessly with your Style Sourcebook mood boards.
Auto-generates polished, interactive schedules in just one click.
Allows full design presentations, all in one place (skip the spreadsheets and PDFs).
In a nutshell: Easy updates, beautiful branding, zero fuss.
Sarah from Sarah Bourke Interior Design shares her thoughts on using Project Studio professionally to share her projects with clients:

"Style Sourcebook is an essential part of my design process. I use it to create mood boards that guide the design direction for my clients, and from there, everything flows.
Project Studio allows me to create detailed FF&E schedules for client approval, which I can easily share with builders and trades.”
“I love how professionally everything is presented, I can include floor plans, cabinetry elevations, reflected ceiling plans, and pull it all together into a beautifully presented document for the client.”
“I’ve built a great library of products within the platform, and the support from the Style Sourcebook team is second to none."
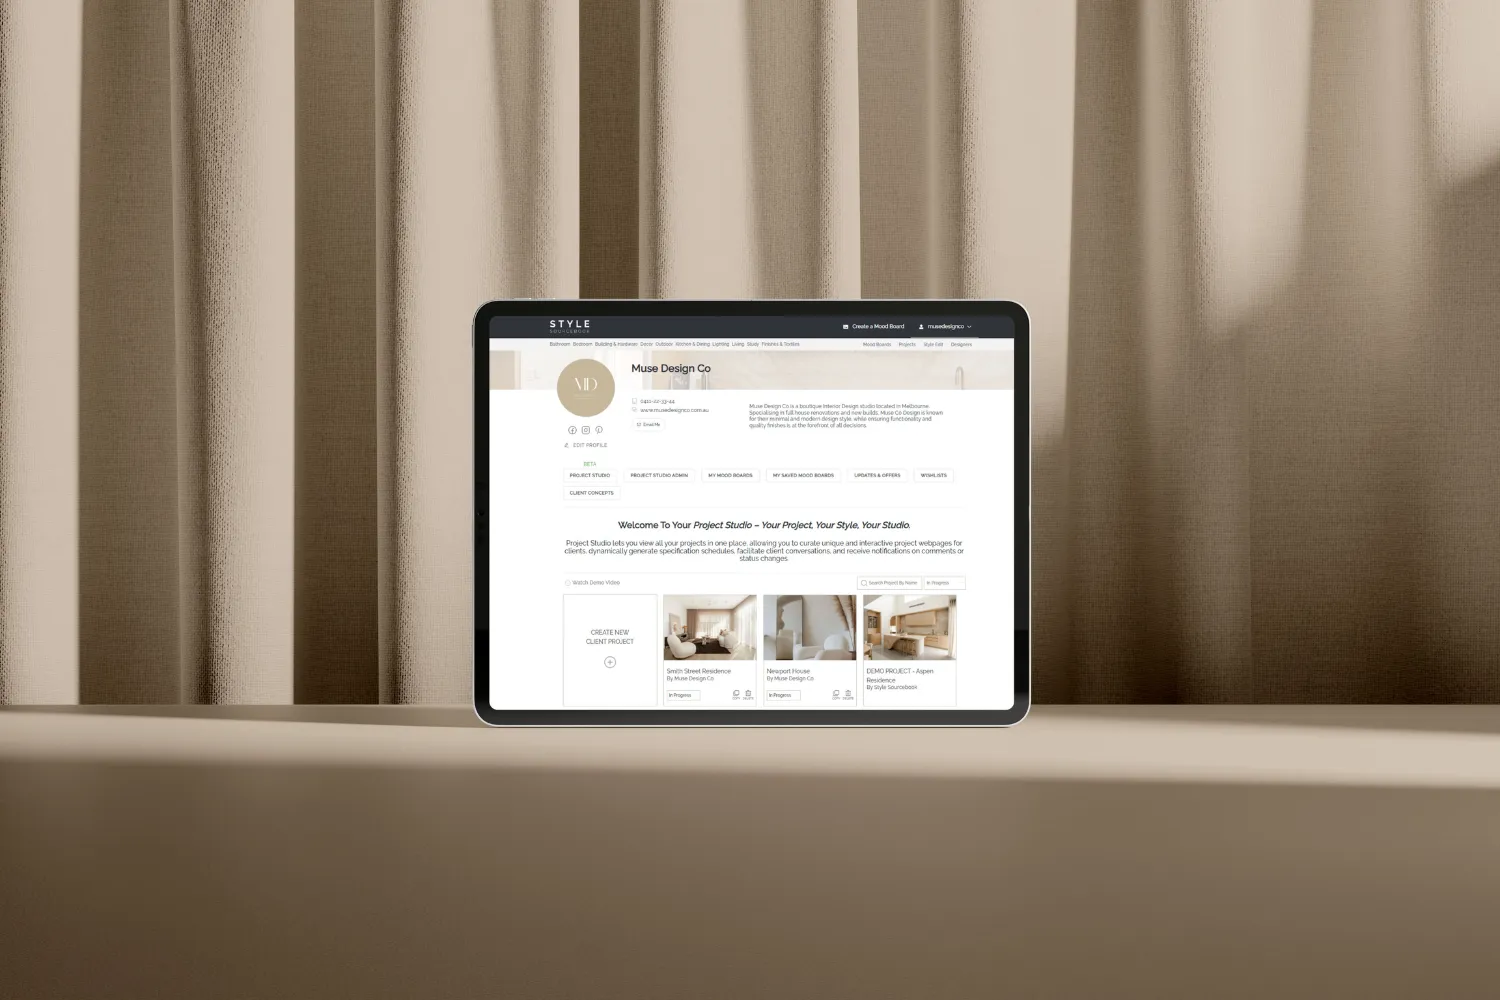
On that note, if you’re worried about how your clients will use it, don’t be! Project Studio is presented as a single interactive webpage where clients can easily view the project and leave comments in one central place. It removes the need for long email threads and eliminates confusion around which document is the most up-to-date, too. The shared link becomes the definitive version of the project: always current, clearly organised, and easy to revisit even after the project is complete for future reference.

Hidden Gems in Project Studio
Do you want to level up how you use Project Studio, or are you still deciding whether Project Studio is the ideal tool for you?
Let’s uncover three things that you didn't know you could do in Project Studio. Say hello to time saved in admin work, an easier workflow, and streamlined communication with your clients. You'll be thanking us later!
1. Use your project webpage as a working document
Share the same link to your client multiple times throughout the design process. Start with a high-level overview for client approval, then build it out as the project evolves. The link stays the same - just re-publish and let your client know to refresh the link.
2. Keep the conversation going without re-publishing
Comment back and forth directly with your client on your project webpage. No need to re-publish every time you or your client adds feedback.
3. Customise your schedules
Hide or remove rows and columns within the schedules to suit your workflow. Easily reorder products with the arrows or drag-and-drop to your desired spot.
“I contract to a few different builders and help their clients with colour selections. Over the years, I’ve noticed they struggle to visualise what their house is going to look like. So, as soon as I saw Style Sourcebook and Project Studio, I knew it was something I needed to implement into my business. The client receives a live link, meaning all changes can be updated, and all builders, suppliers, and clients can see updates made.”
Francesca, Interior Designer | Studio Cesca
Designed for How Designers Work
Project Studio doesn’t change how you design; it supports how you already work. Whether you’re concept-first or detail-driven, it adapts to your process, helping you move projects forward with clarity, confidence, and far less admin along the way.
Here’s what we know for sure: you’ll spend less time chasing emails, updating documents, or double-checking versions, so you’ll have more time dreaming up concepts, refining the details that matter, and confidently presenting your vision. Great design deserves a workflow that feels just as considered: one that frees you up to create boldly, work smarter, and enjoy the process along the way.
Ready to turn your ideas into action? Create your first project in Project Studio and streamline your workflow for the best results!